Just a quick update and Sky Captain ray gun update
I have a slew of things I should post here and on https://skyfortress.studio but since it’s prominently displayed here, I wanted to post an update re: my Sky Captain (or Dex) ray gun model. I’ve made a lot of refinements and here’s the current build.
Something in the works – Sky Captain, Dex’s ray gun
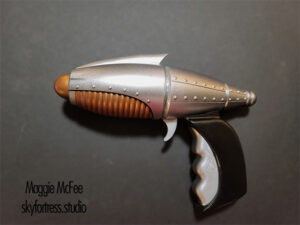
UPDATE: Here’s a pic of the assembled and finished version (plus stand).
UPDATE UPDATE: This now lives in Adam Savage’s cave. But I have made more since.

Sky Captain and the World of Tomorrow ray gun replica by Maggie McFee
So let me just get this confession out of the way.
I love Kerry Conran’s Sky Captain and the World of Tomorrow. I love it to death, warts and all. Roger Ebert said of the film, “It’s like a film that escaped from the imagination directly onto the screen, without having to pass through reality along the way.”
Well, the imagination in question could have been mine, if it hadn’t been Kerry and Kevin Conran’s. It speaks to me on a very deep level; It’s a film that could have been made just for me. I’m not old enough to remember film and radio serials, obviously, but I did grow up on a steady diet of SciFi — Doctor Who and Star Trek being staples of my diet and, of course, Star Wars — and that diet sometimes included old serials which played on a local TV station late at night as filler for the late night movie. I recall many a night sneaking out of bed to watch Flash Gordon or some other B&W treat quietly in the living room while my parents slept. Hey, they advertised them during the afternoon when I was watching cartoons, how could I resist? Later in life I developed a fascination with old radio serials as well and listened to countless hours of them.
Sky Captain was like a concentrated booster shot of all that: Giant robots, heroes in tricked out aircraft, swaggering female fighter aces, flying aircraft carriers… and ray guns. Sky Captain was a siren call to me in 2004. And there’s one prop from the film I’ve always wanted, in some form or other, but never have found: Dex’s ray gun. Sure, I have the ornament version, but that’s small consolation. Literally. So I decided it was time to make my own and got to modeling. I’ve printed a couple (you can see one here, but bear in mind this is a rough version) to test and hand fit and I’m still tweaking, but it’s about 95% done, I think. I’ve extended the nose cone a bit since I took this screen shot, but this is how the current model looks.
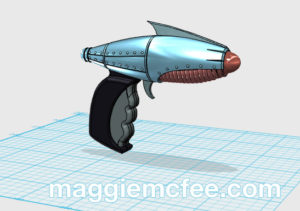
More soon as I’ll be building and painting a clean final version soon.
Prototyping and Printing
I finally broke down and bought a grown-up 3D printer. My Prusa i3 was fine, as far as it went, but my growing envy of the nice (and giant) prints of Lulzbot TAZ 5 owners’s like James Bruton did me in. So I bought a Lulzbot TAZ 5 and added a FlexyDually dual extruder which allows me to print in normal materials from the primary head as well as flexible (such as Ninjaflex) and support materials from a second head. And I don’t regret it one bit. This machine is heaven. It’s like going from a motorcycle to a luxury car.
Speaking of printing, I’ve been designing/prototyping some props. More on all these later, but here’s a peek at what’s on deck at the moment.
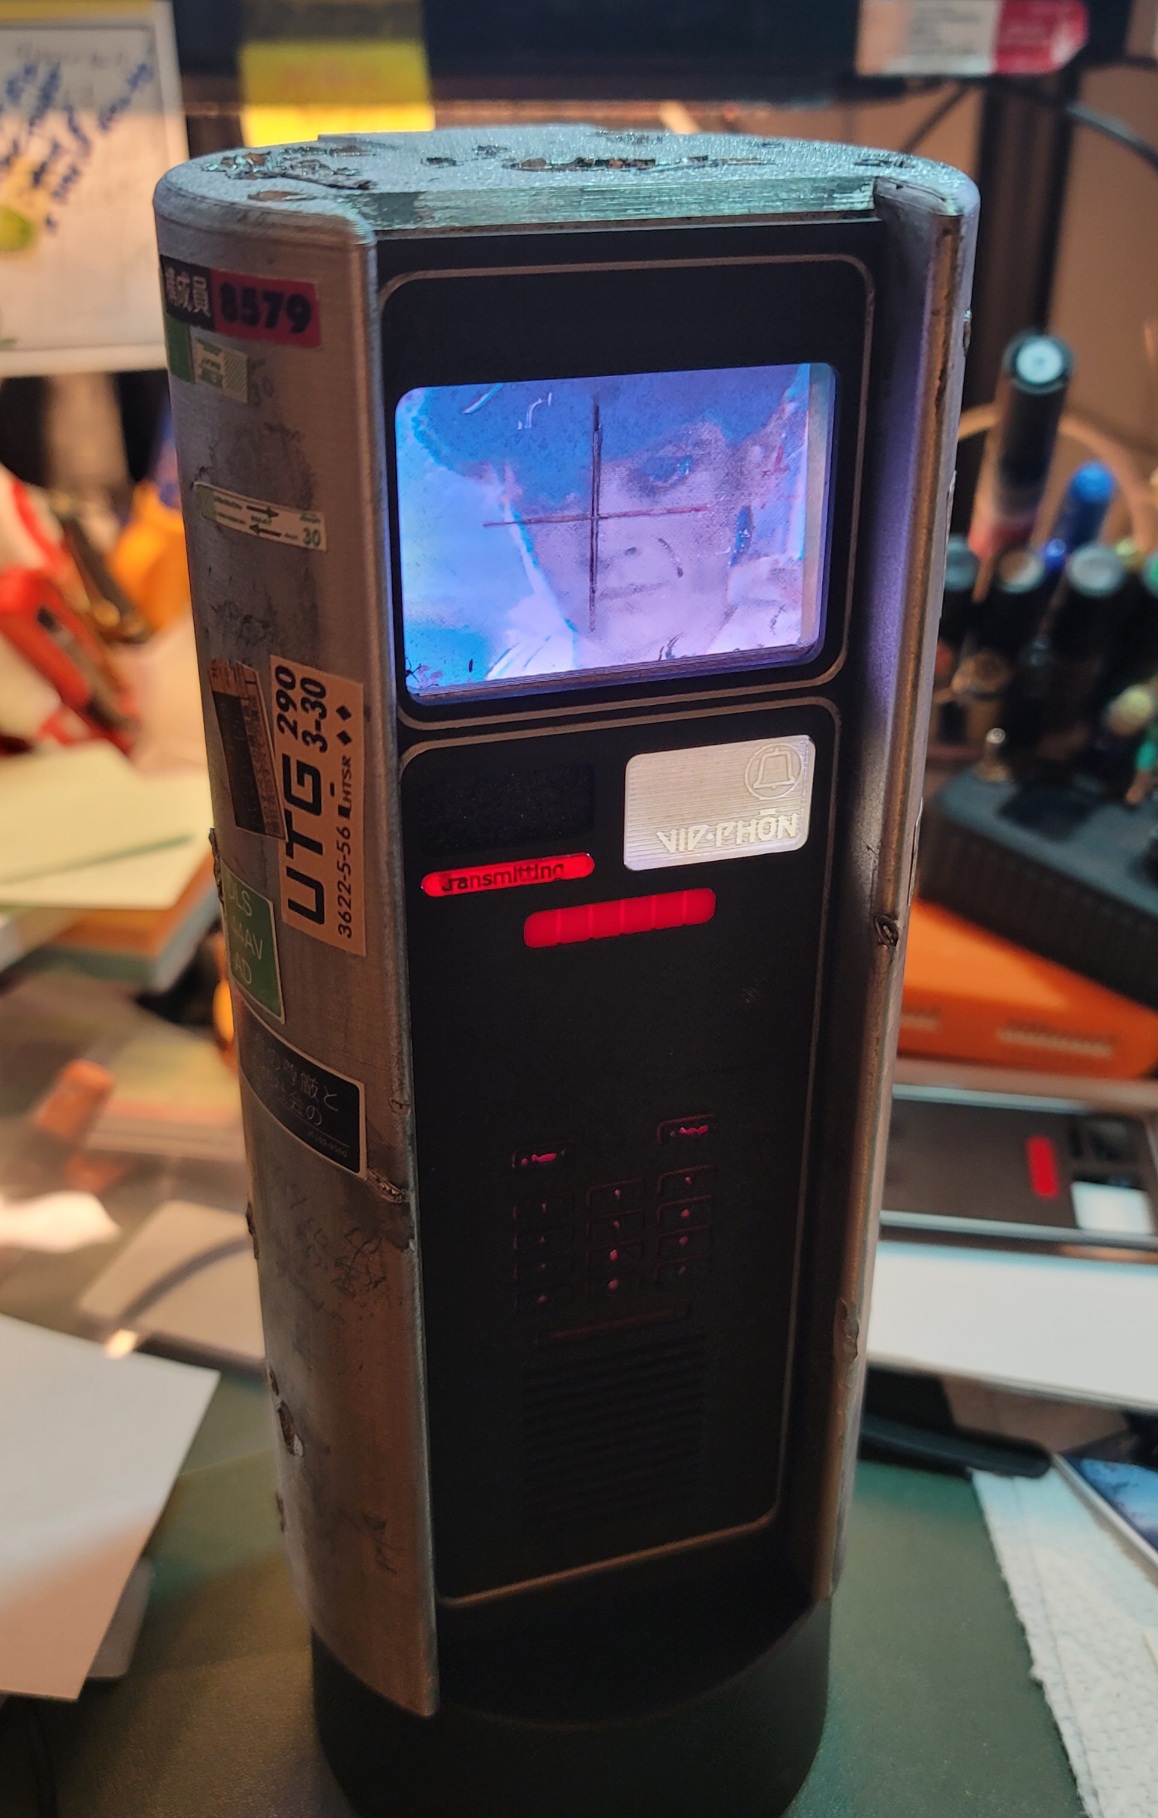
 The first is a scratch-built Commlock (another Space: 1999 prop). I’m calling it a prototype in that the idea was to figure out how to build one well by building one at all. :) I have a screen and electronics for the next iteration using what I learned. This one, as will the next, was built from Plastruct sheets and tubing, some laser cut elements, 3D printed buttons with white-on-black label tape for the numbers.
Related, I just bought a Century Casting commlock off eBay, so I’ll build that later as well. But the scratch-builts are my first priority.

I’ve also been working on 3D modeling the Vulcan 65 grenade from the first Hellboy movie. I have a few additions to make on the internals and just finished making the top removable, but I’ve pretty happy with the overall design. I’ll make a couple more and then I may make a cast of it so I can make some resin versions. I plan to add LEDs to one or two of the later printed ones.
The lettering is done using waterslide decals I designed and printed in Photoshop.
 Yet another Hellboy prop I’m working on is Ilsa’s salt cellar, the one containing the tears of a thousand angels (or martyrs in the earlier script). This one has been all about modeling and learning to make a patina’d surface look right. I solid-modeled the base, legs and dome. The glass is just a 7″ glass vase. It’s not exactly the right size. It’s 7″ high and about 3.2″ wide, should be more like 4″ wide, I think. I’m currently looking for a better one (or two… or twelve). Adam Savage actually owns the original and once put up a bunch of hi-rez photos on The RPF, but they’re no longer there. So I’m working on the [missing] dome art using screen grabs from the movie. I have to sort out how to do the knurling on the edges since that’s difficult to print.
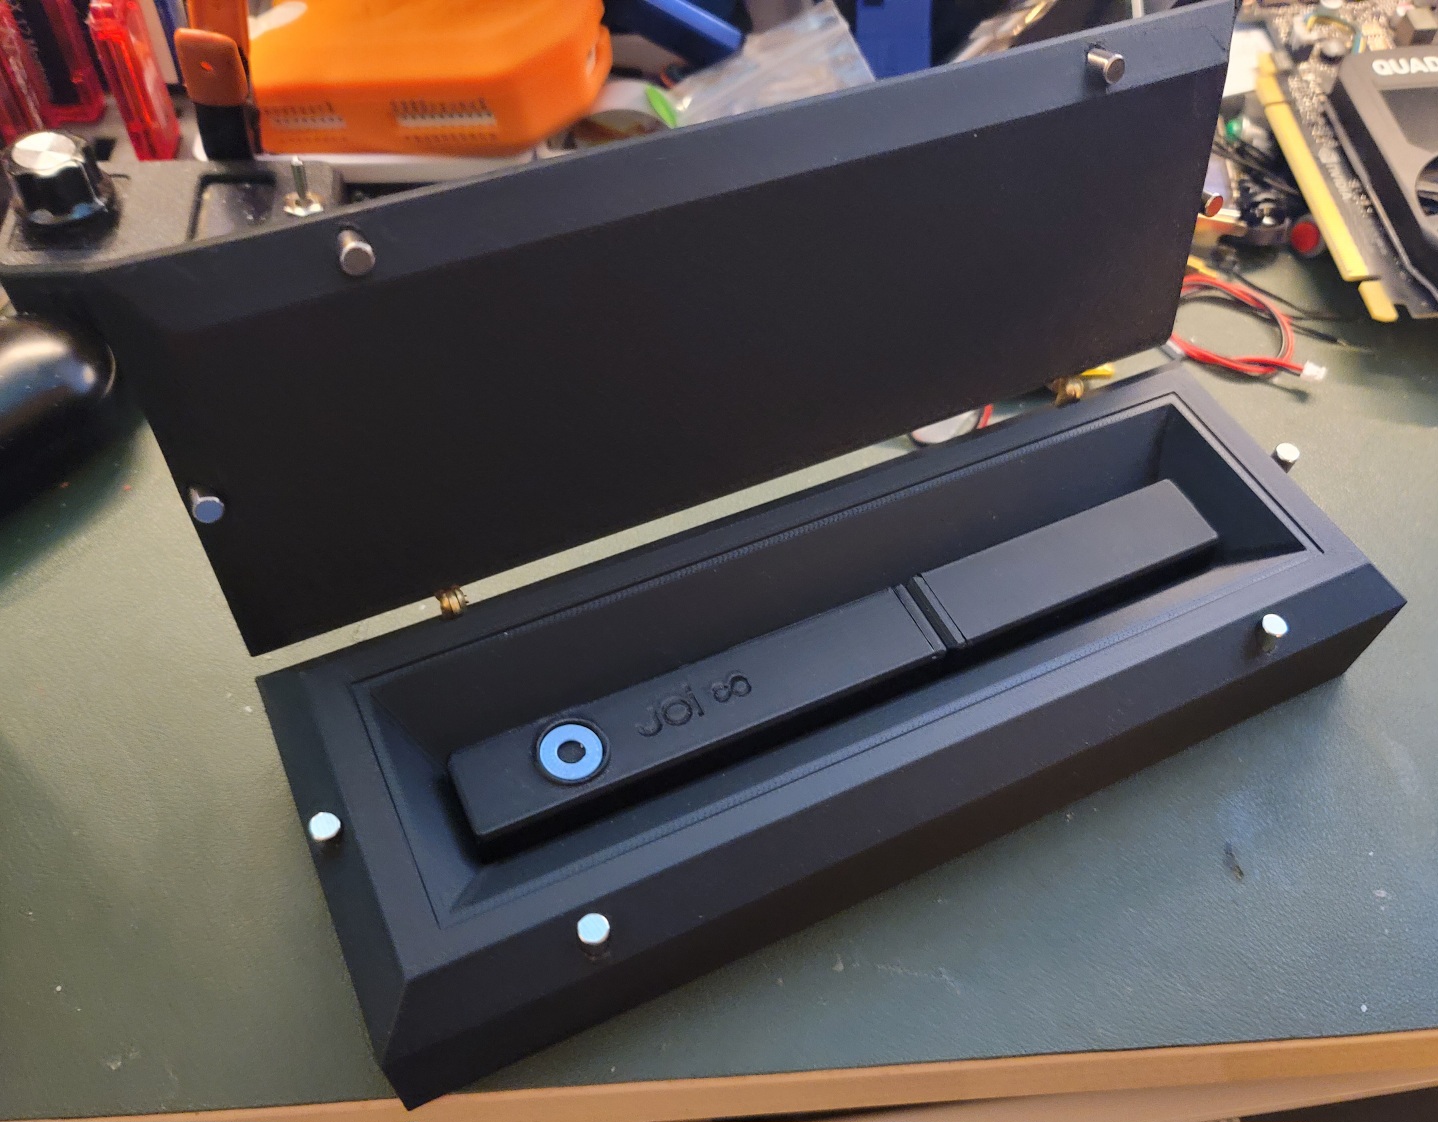
 Speaking of Adam Savage, I’m also working on a replica of a prop he was originally involved in designing and building. In Bicentennial Man, there’s a very neat little art deco eye examination device. It’s all black and brass and it’s terribly, terribly interesting. I started modeling it a while ago and printed a test to make sure it all fit together. It didn’t. But I sanded it down and slapped some paint on it just to see how it looked. It looked like someone painted it quickly is what it looked like. hehe Anywho, I’ve added the splines on the sides and adjusted the center piece so the next one should fit together better. Once I’ve got it looking right I’ll print another, add the LEDS and do a proper paint on it. Maybe I’ll also send one to Adam… ;)
And then I’d like to build a HUD Motion Tracker from Aliens… but that’s for another day.
Afternoon diorama build for NECA Alien figures
The original Alien movie is still one of my favorite films. Like it’s sibling Blade Runner, also one of my all-time favorites, I’ve no idea how many times I’ve seen it. Let’s just go with “A lot.”
I recently bought some of NECA’s fantastic Alien and Aliens figures, so I decided I wanted to build dioramas for at least two scenes, maybe three. For sure I wanted to build one of Ripley and the ‘Big Chap’ xenomorph in a Nostromo corridor. Another I plan to do is an airlock scene with [all space-suited] Dallas, an Amanda Ripley figure standing in for Lambert, and Kane with melted visor and facehugger. I’m also considering a Narcissus shuttle scene with Ripley in the white ‘compression suit’ and a Big Chap, but I’m not sure if I’ll get up the nerve to tackle that as it’s a bit more complex. I also have the NECA Powerloader, so… who knows what could happen with that one day!
Here’s the first diorama, Ripley (and Jones!) and Big Chap in a corridor of the Nostromo. The overall structure is made of white and black foamcore glued to a hardboard base. The pipes, slats and straight bits are Plastruct styrene elements. The floor is Plastruct terracotta roof sheet sprayed black. The other bits (mostly hidden behind the xenomorph in the photos, unfortunately) are kit-bashed from sprues, the Tamiya Flakvierling 38 kit and I think a couple of things from a AMT Saturn V kit.


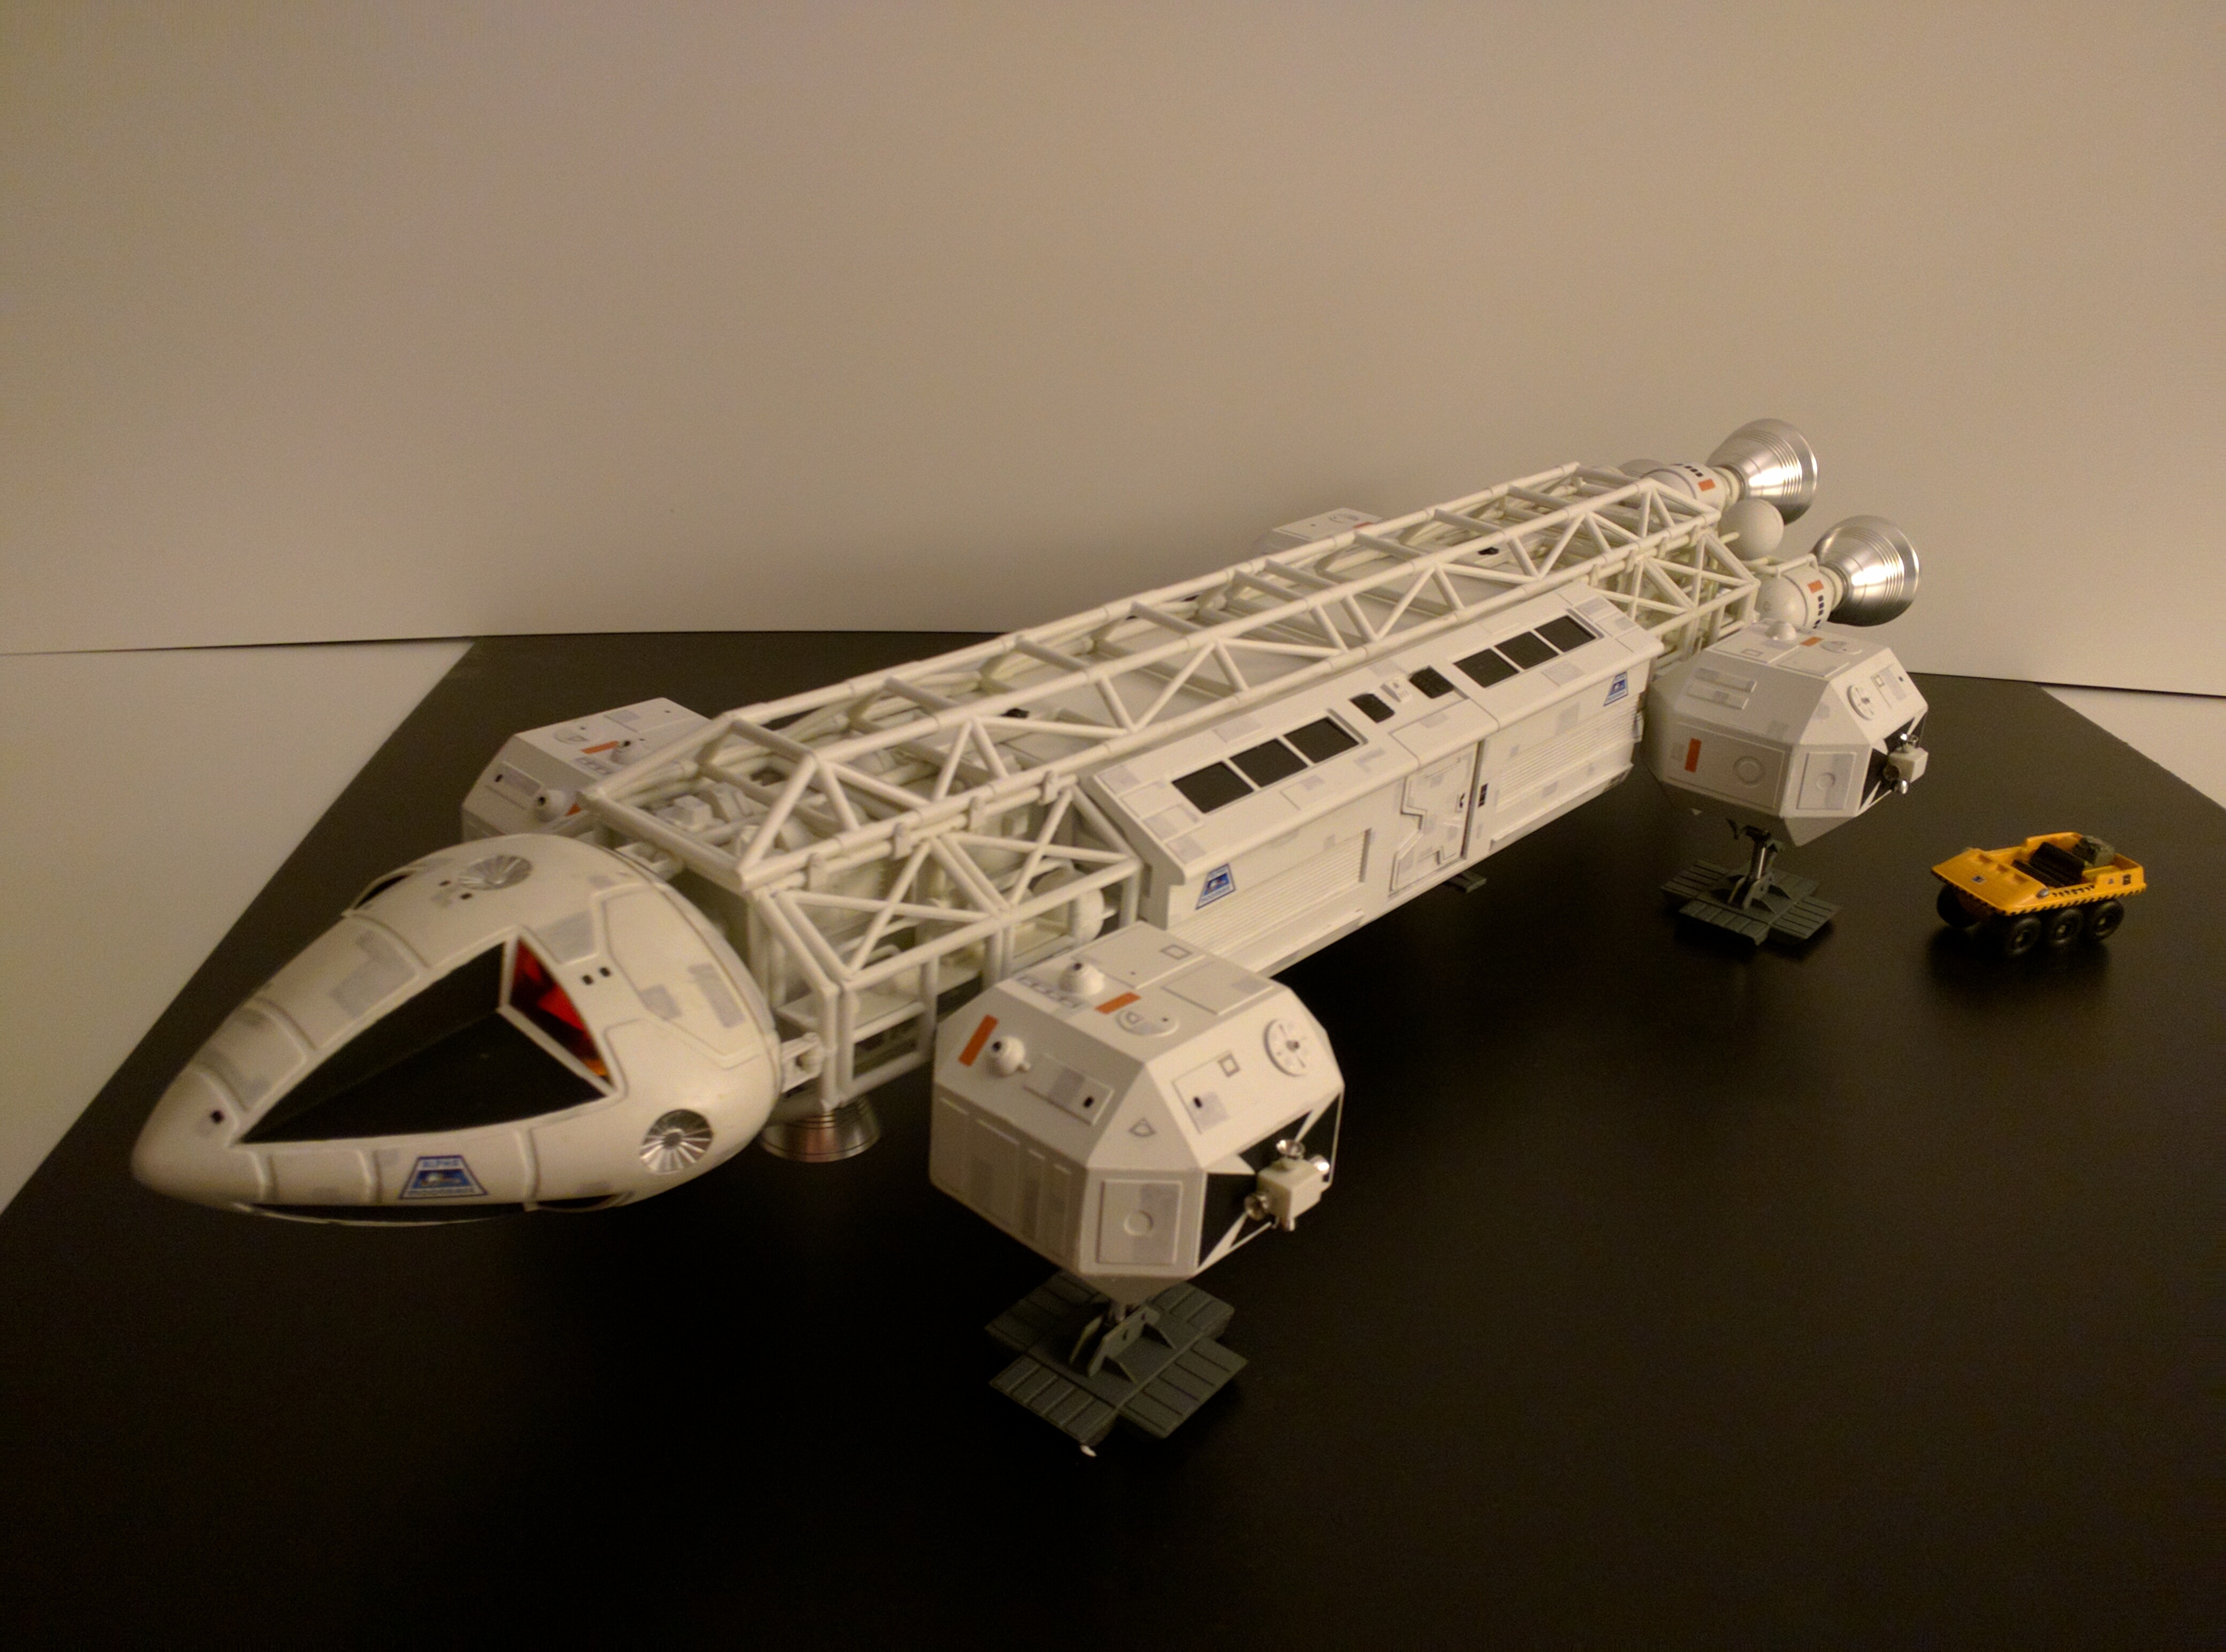
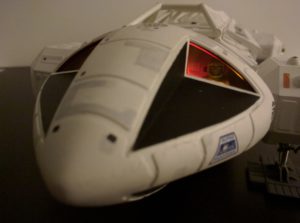
Space: 1999 22″ Eagle build
Recently Round2 released the model I’ve been waiting most of my life for: A 22″ Eagle Transporter from Space:1999. I can’t adequately express my love for this [fictional] spacecraft design. It is simply brilliant and utterly believable. It’s practical and beautiful in its utilitarianism. The show itself hasn’t aged well, but the design of this wonderful craft certainly has. So. I had to build one… maybe two. As I told my friend John [Foster, also an Eagle enthusiast], I have an Eagle Rule; When any new Eagle model is released, all other projects hit the backburner.
In the past, I’ve built one each of the old (and just ‘adequate’) MPC and AMT 11″ kits. This was some time ago and I don’t have either any more. But since then I’ve built a Warp Models kit (resin kit with lots of white metal parts including an all-metal spine) and the Round2 Deluxe re-issue of the MPC kit with lab pod and booster.
But the 22″ is the one I’ve been waiting on… for years. And not only did Round2 produce a 22″ Eagle kit, they also offered an upgrade kit with metal engine bells and another kit with metal attitude thrusters. Being the lover of this fictional spacecraft that I am, I went for the upgrades along with the kit. In fact… I ended up buying two sets of all. One day I’ll build another 22″ with, maybe, a rescue pod. (I recommend visiting CultTVMan if you’d like to buy your own)
OK. Apart from being bigger, what’s the deal with this whole 22″ thing? During the original production of Space: 1999 three scales of Eagle Transporters were built. 44-inches, 22-inches and roughly 11-inches (OK, and a 5-inch version, but… no one ever talks about that one). I don’t expect I’ll ever build or acquire a 44″ Eagle, but I’m quite happy with the 22″ version. I also built a 1:48 scale buggy to go with it as I did for my 1:72 Warp Models Eagle (shown below for size comparison).
So without further ado, my 22″ Eagle Transporter (I may post some ‘in progress’ pics later):


Hellboy Samaritan replica

I probably implied I was then going back to work on the 22″Â Round 2 Space 1999 Eagle Transporter I’ve been tweeting about, but… I couldn’t resist. I really do lament not having a Samaritan (aka Good Samaritan) in my collection and constantly kick myself for not having bought one of the Sideshow Collectibles replicas back when they came out. So I downloaded one of the better 3D models out there (thanks danonator and JerseyBeast) and, after tweaking the top strap/breach (I know, it’s a revolver, but it has a breach in the top strap) and some scaling I started printing it to put together later.
And then I couldn’t help myself. The print came out so nice. And my re-modeled breach made me happy and… This happened over the course of yesterday and today
(Update: The stand in the first pic is a new addition. I designed and printed the 2 arms, nameplate, and ammo holder, then painted them to look like old cast bronze. I stained and weathered the wooden box, printed the BPRD logo from the original hilt again and put that all together. I also printed some of d3delta3d’s ammo.)


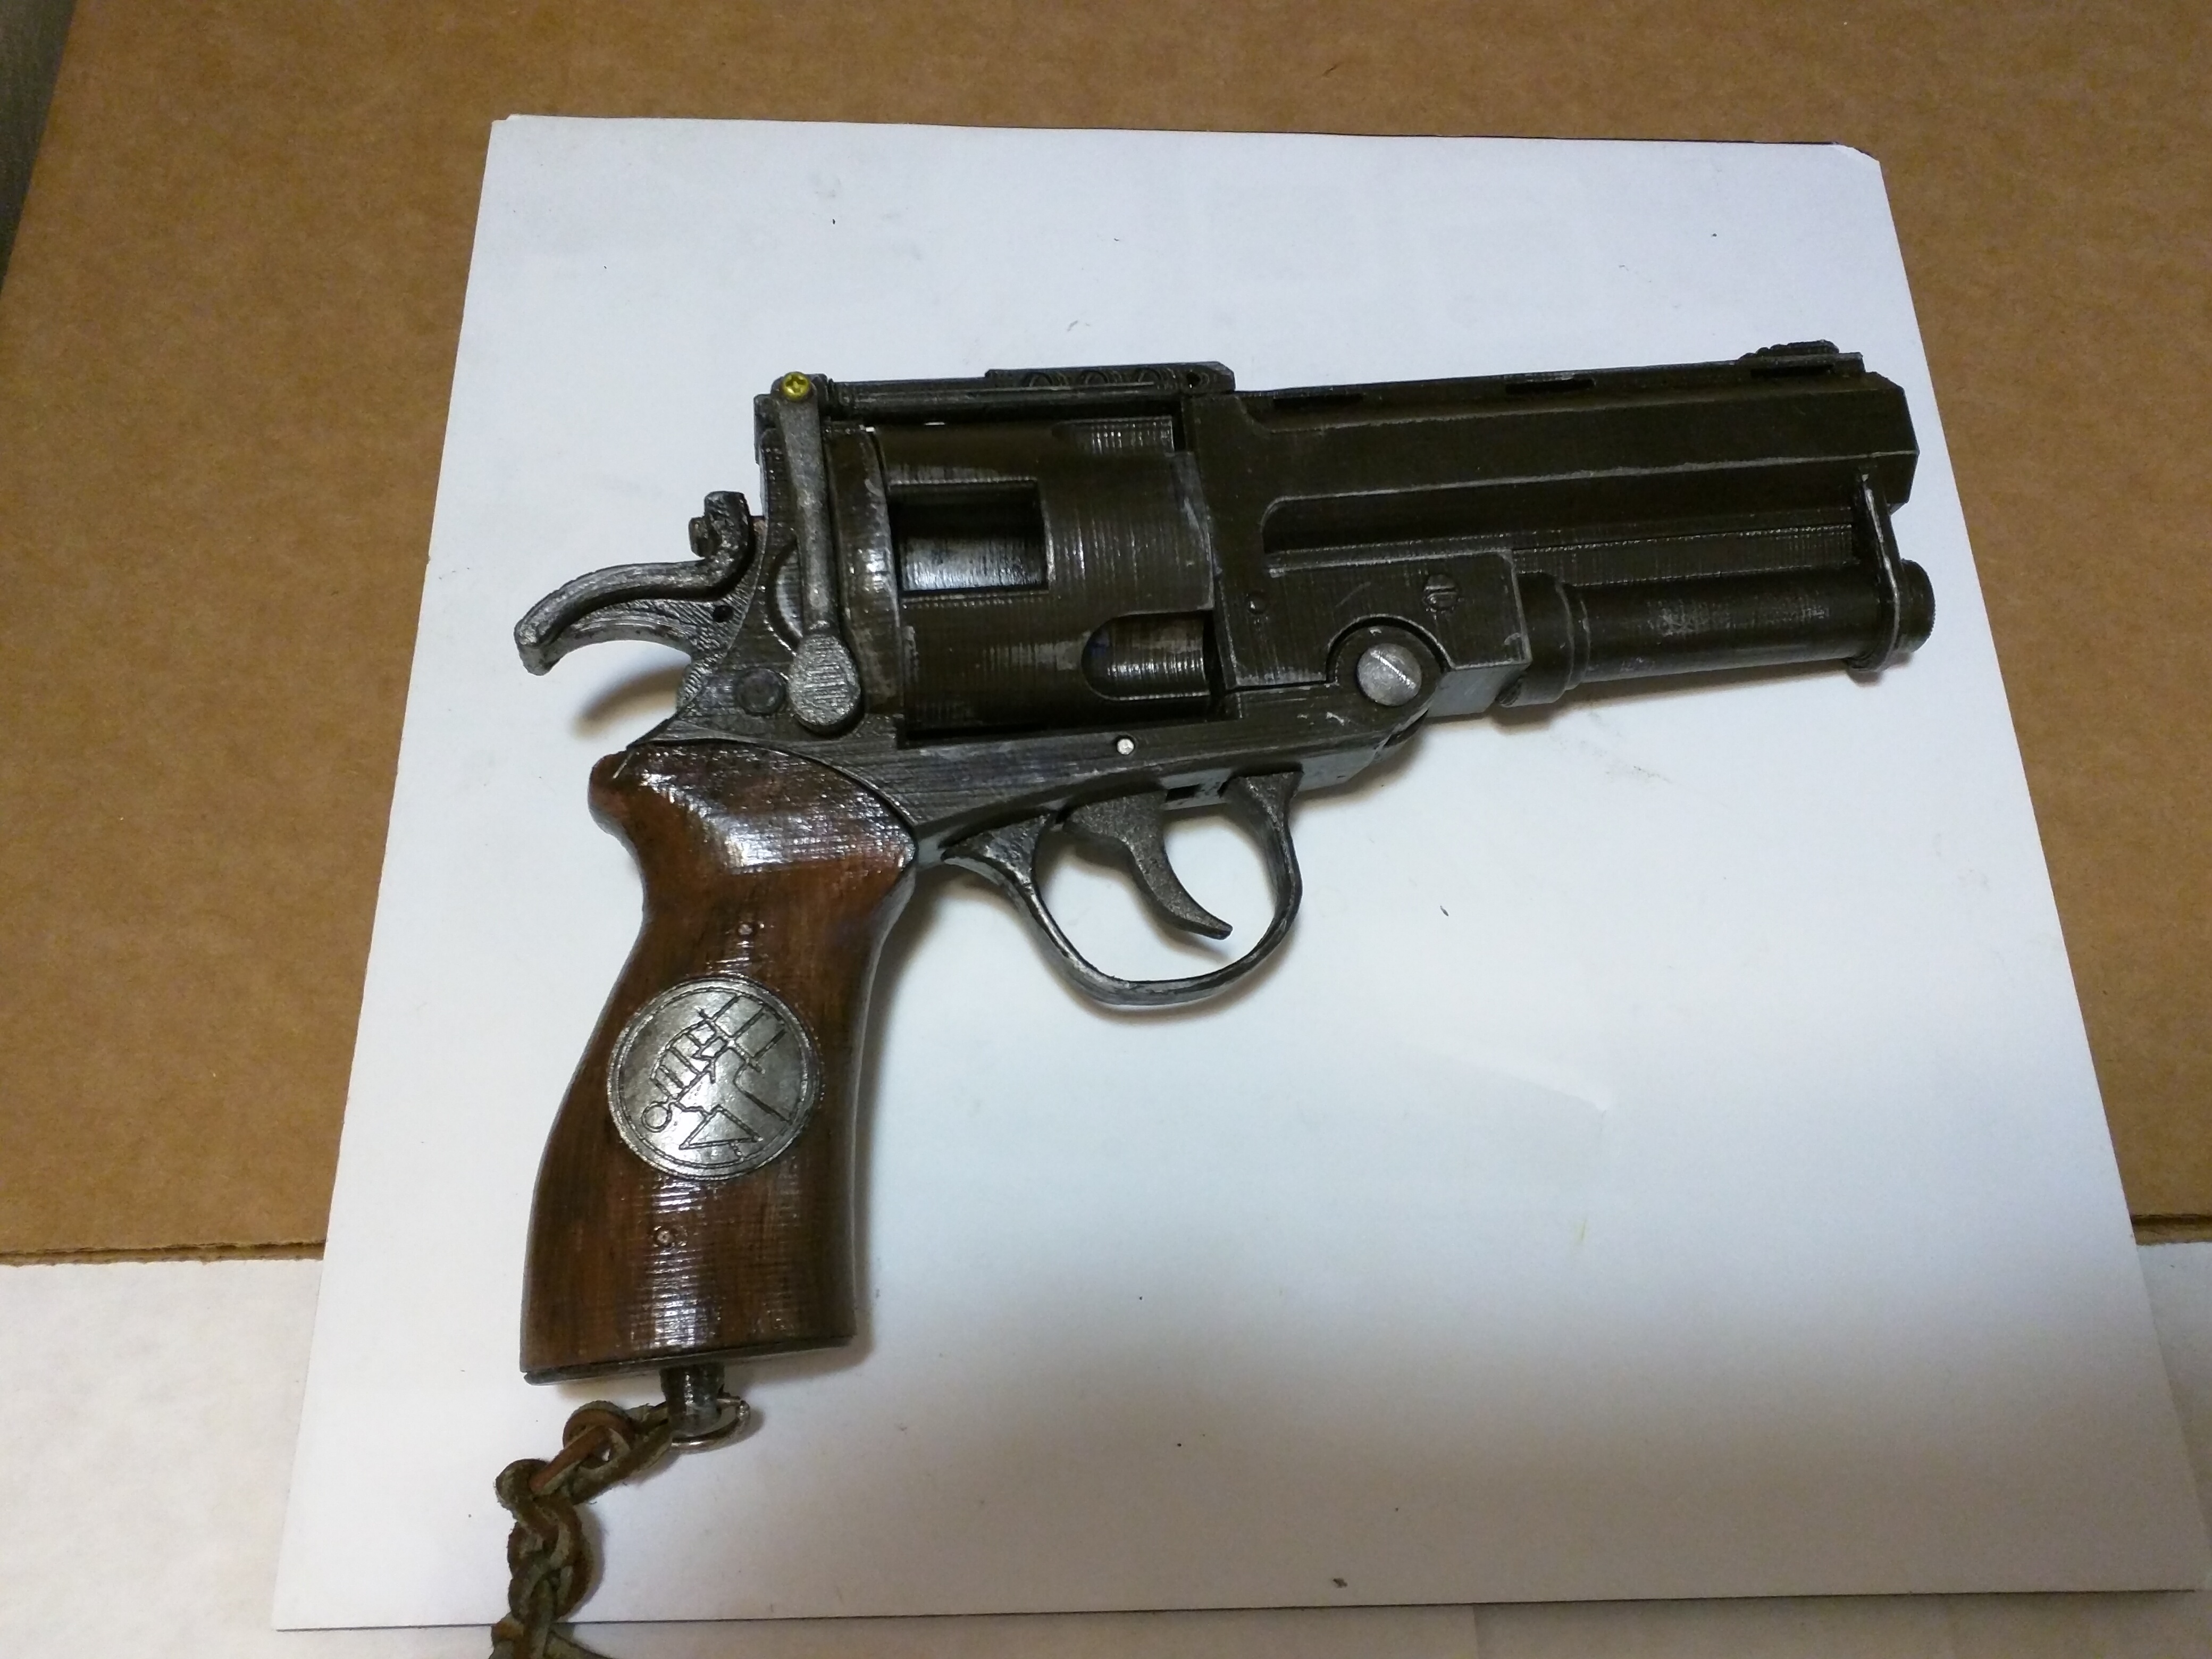

I sanded the print, but I didn’t really go out of my way to hide that it’s 3D-printed. That’s probably most evident on the cylinder and grip. But I did sand, rub down with acetone and then paint the parts with a hammered metal spray. That was topped with some flat clear coat. Then I weathered it with silver (plus rub down with my filthy paint-covered fingers).
The hammer and trigger were painted with metallic shimmer and then dusted with flat black. The pin and one of the screws were done in copper and then smudged to flatten.
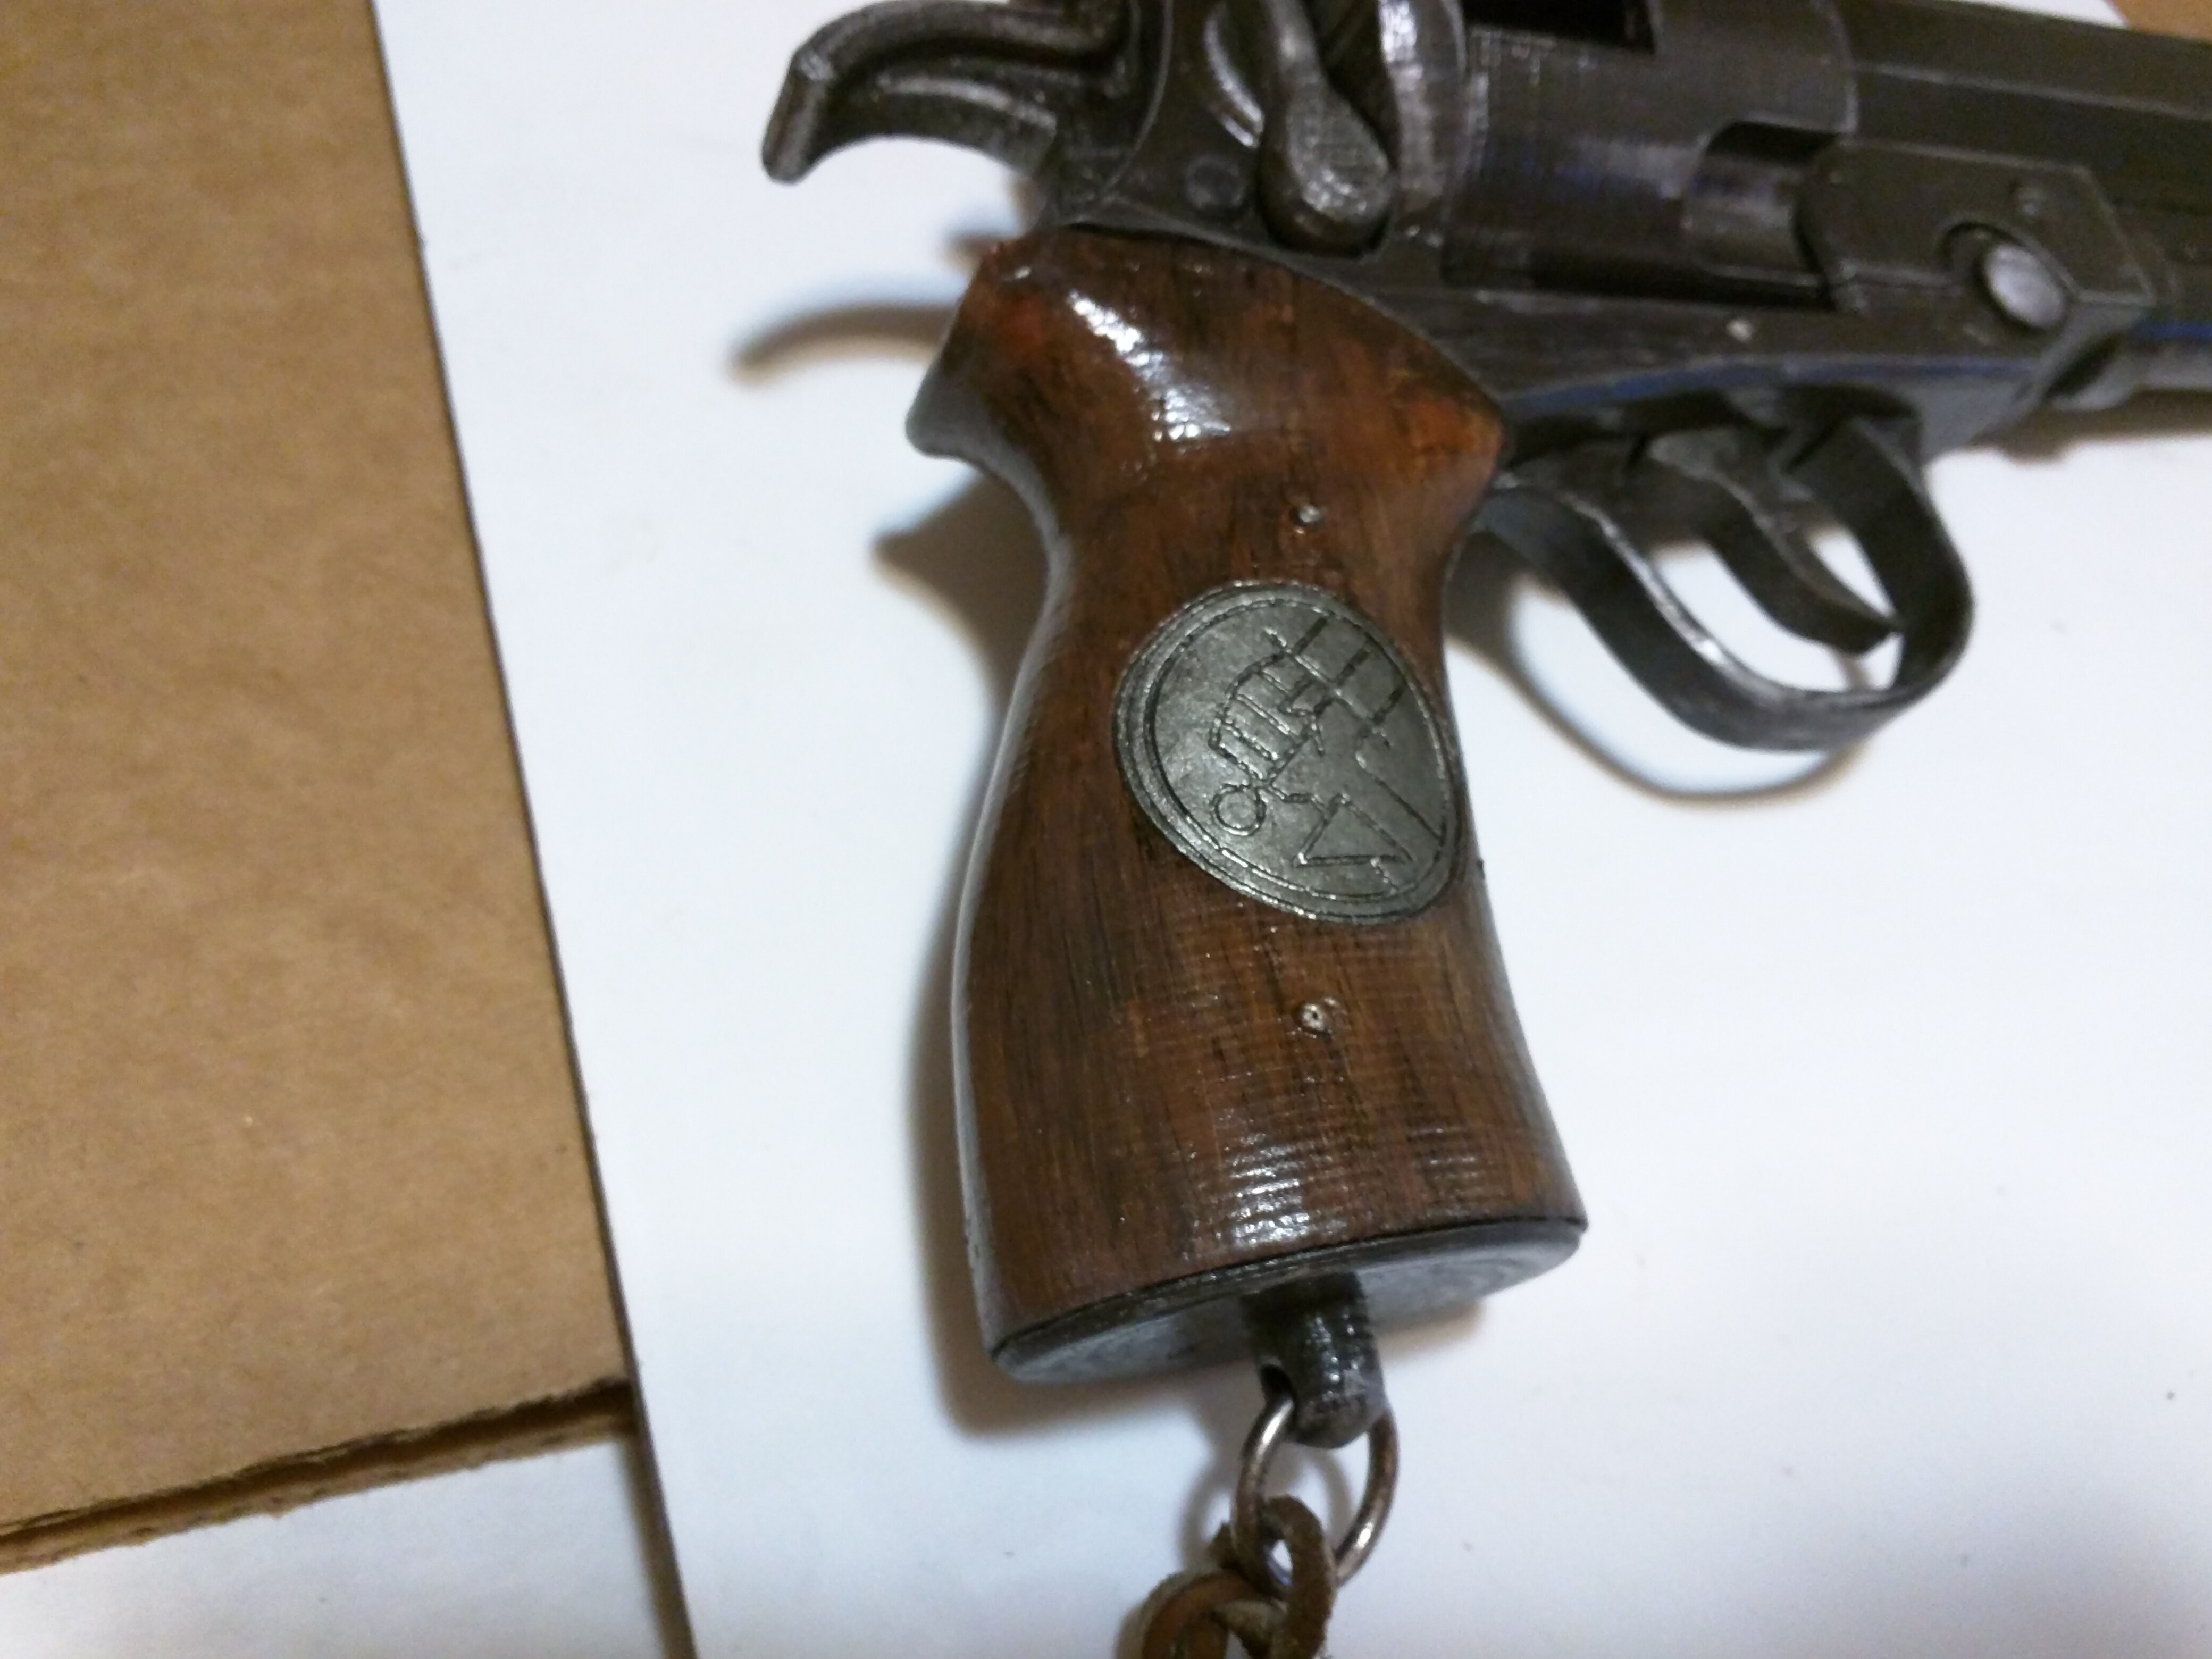
The grip is acrylic paint starting with a dark brown, some watered-down tan on top of that, then black wipes with a brush and later a wide-cell sponge to create the grain. Several coats of clear gloss and it was a fair approximation of the real thing (although the grip isn’t on-model at the crown, but it’s close enough). I added the BPRD medallion, which was painted silver, then weathered with black acrylic and wiped down to a dull iron look.
The ring in the butt (stop laughing) is a piece of jewelry, a captive bead ring, dulled and squeezed into a circle. Then I tied a piece of leather cord to it (after dipping into some coffee to stain it – yes, I was drinking coffee at 10pm, because I’m an adult and I can do what I want.)
And there you have it. A ‘pretty close’ replica of Hellboy’s [Good] Samaritan. I feel better now. Well, I will be after I print some shells for it and a stand. Then, I swear I’ll get back to the Eagle!
But first… maybe I’ll fix the scale and print another that I can make more accurate. For later, I mean. Really!
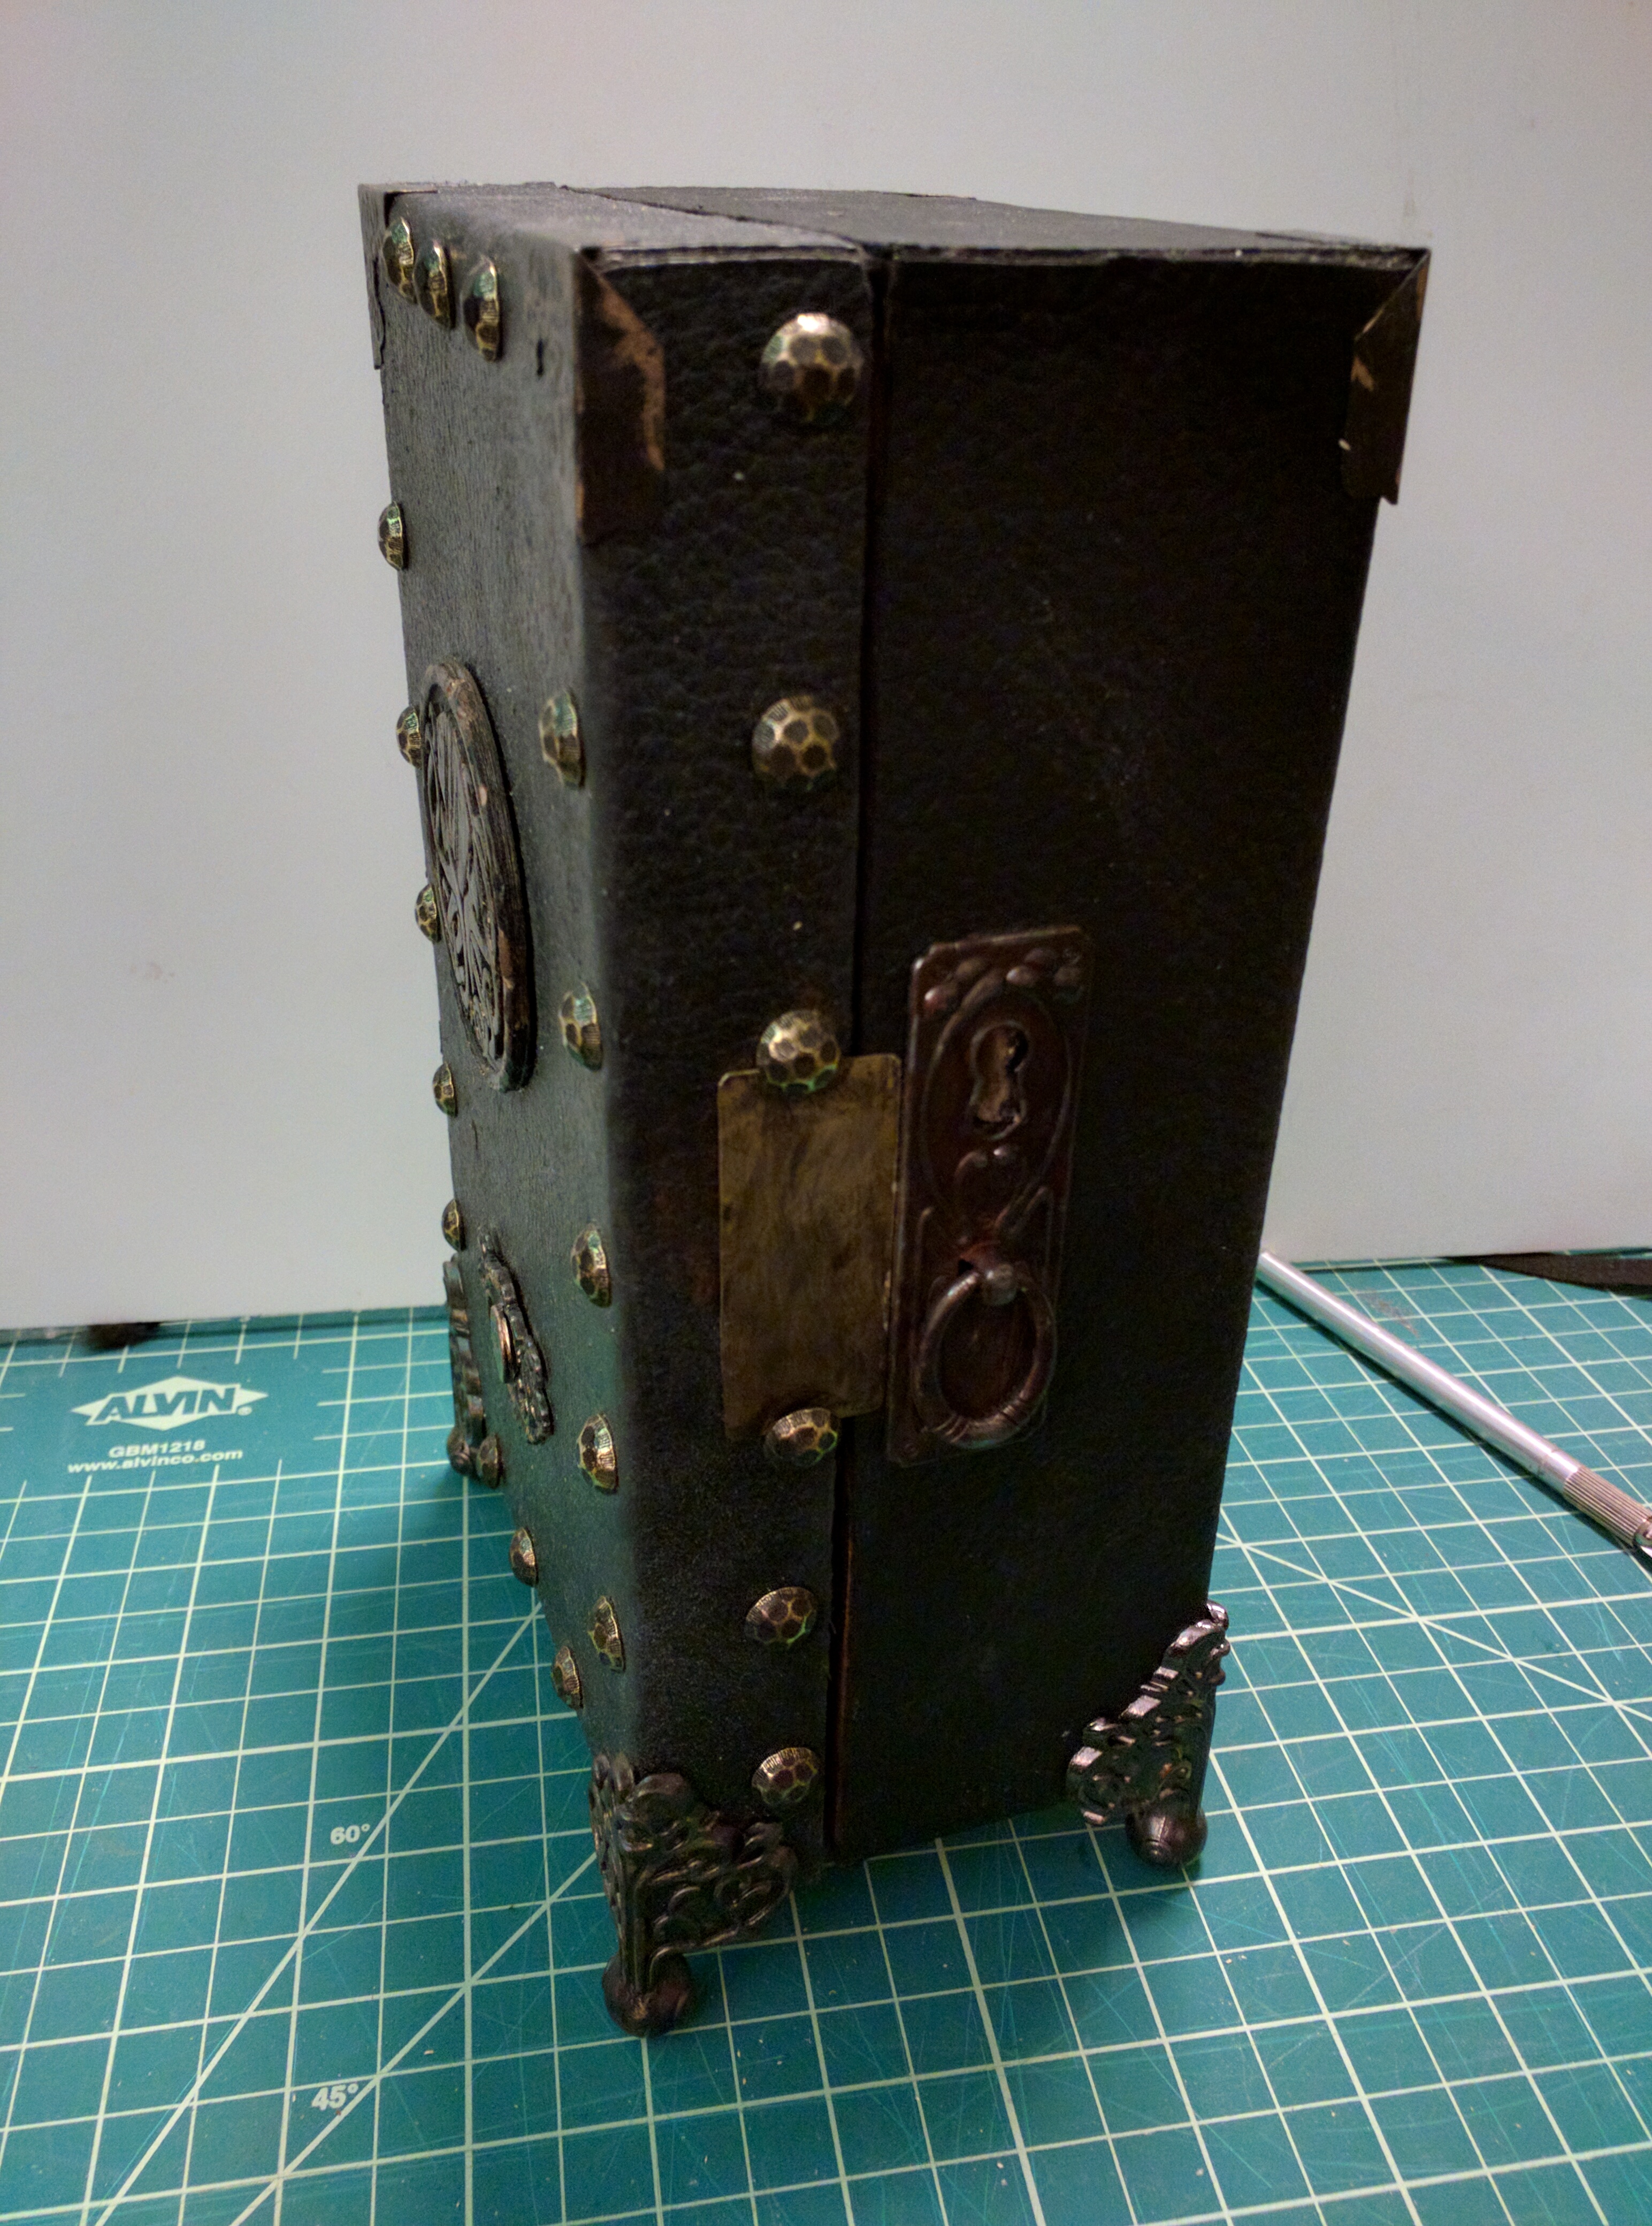
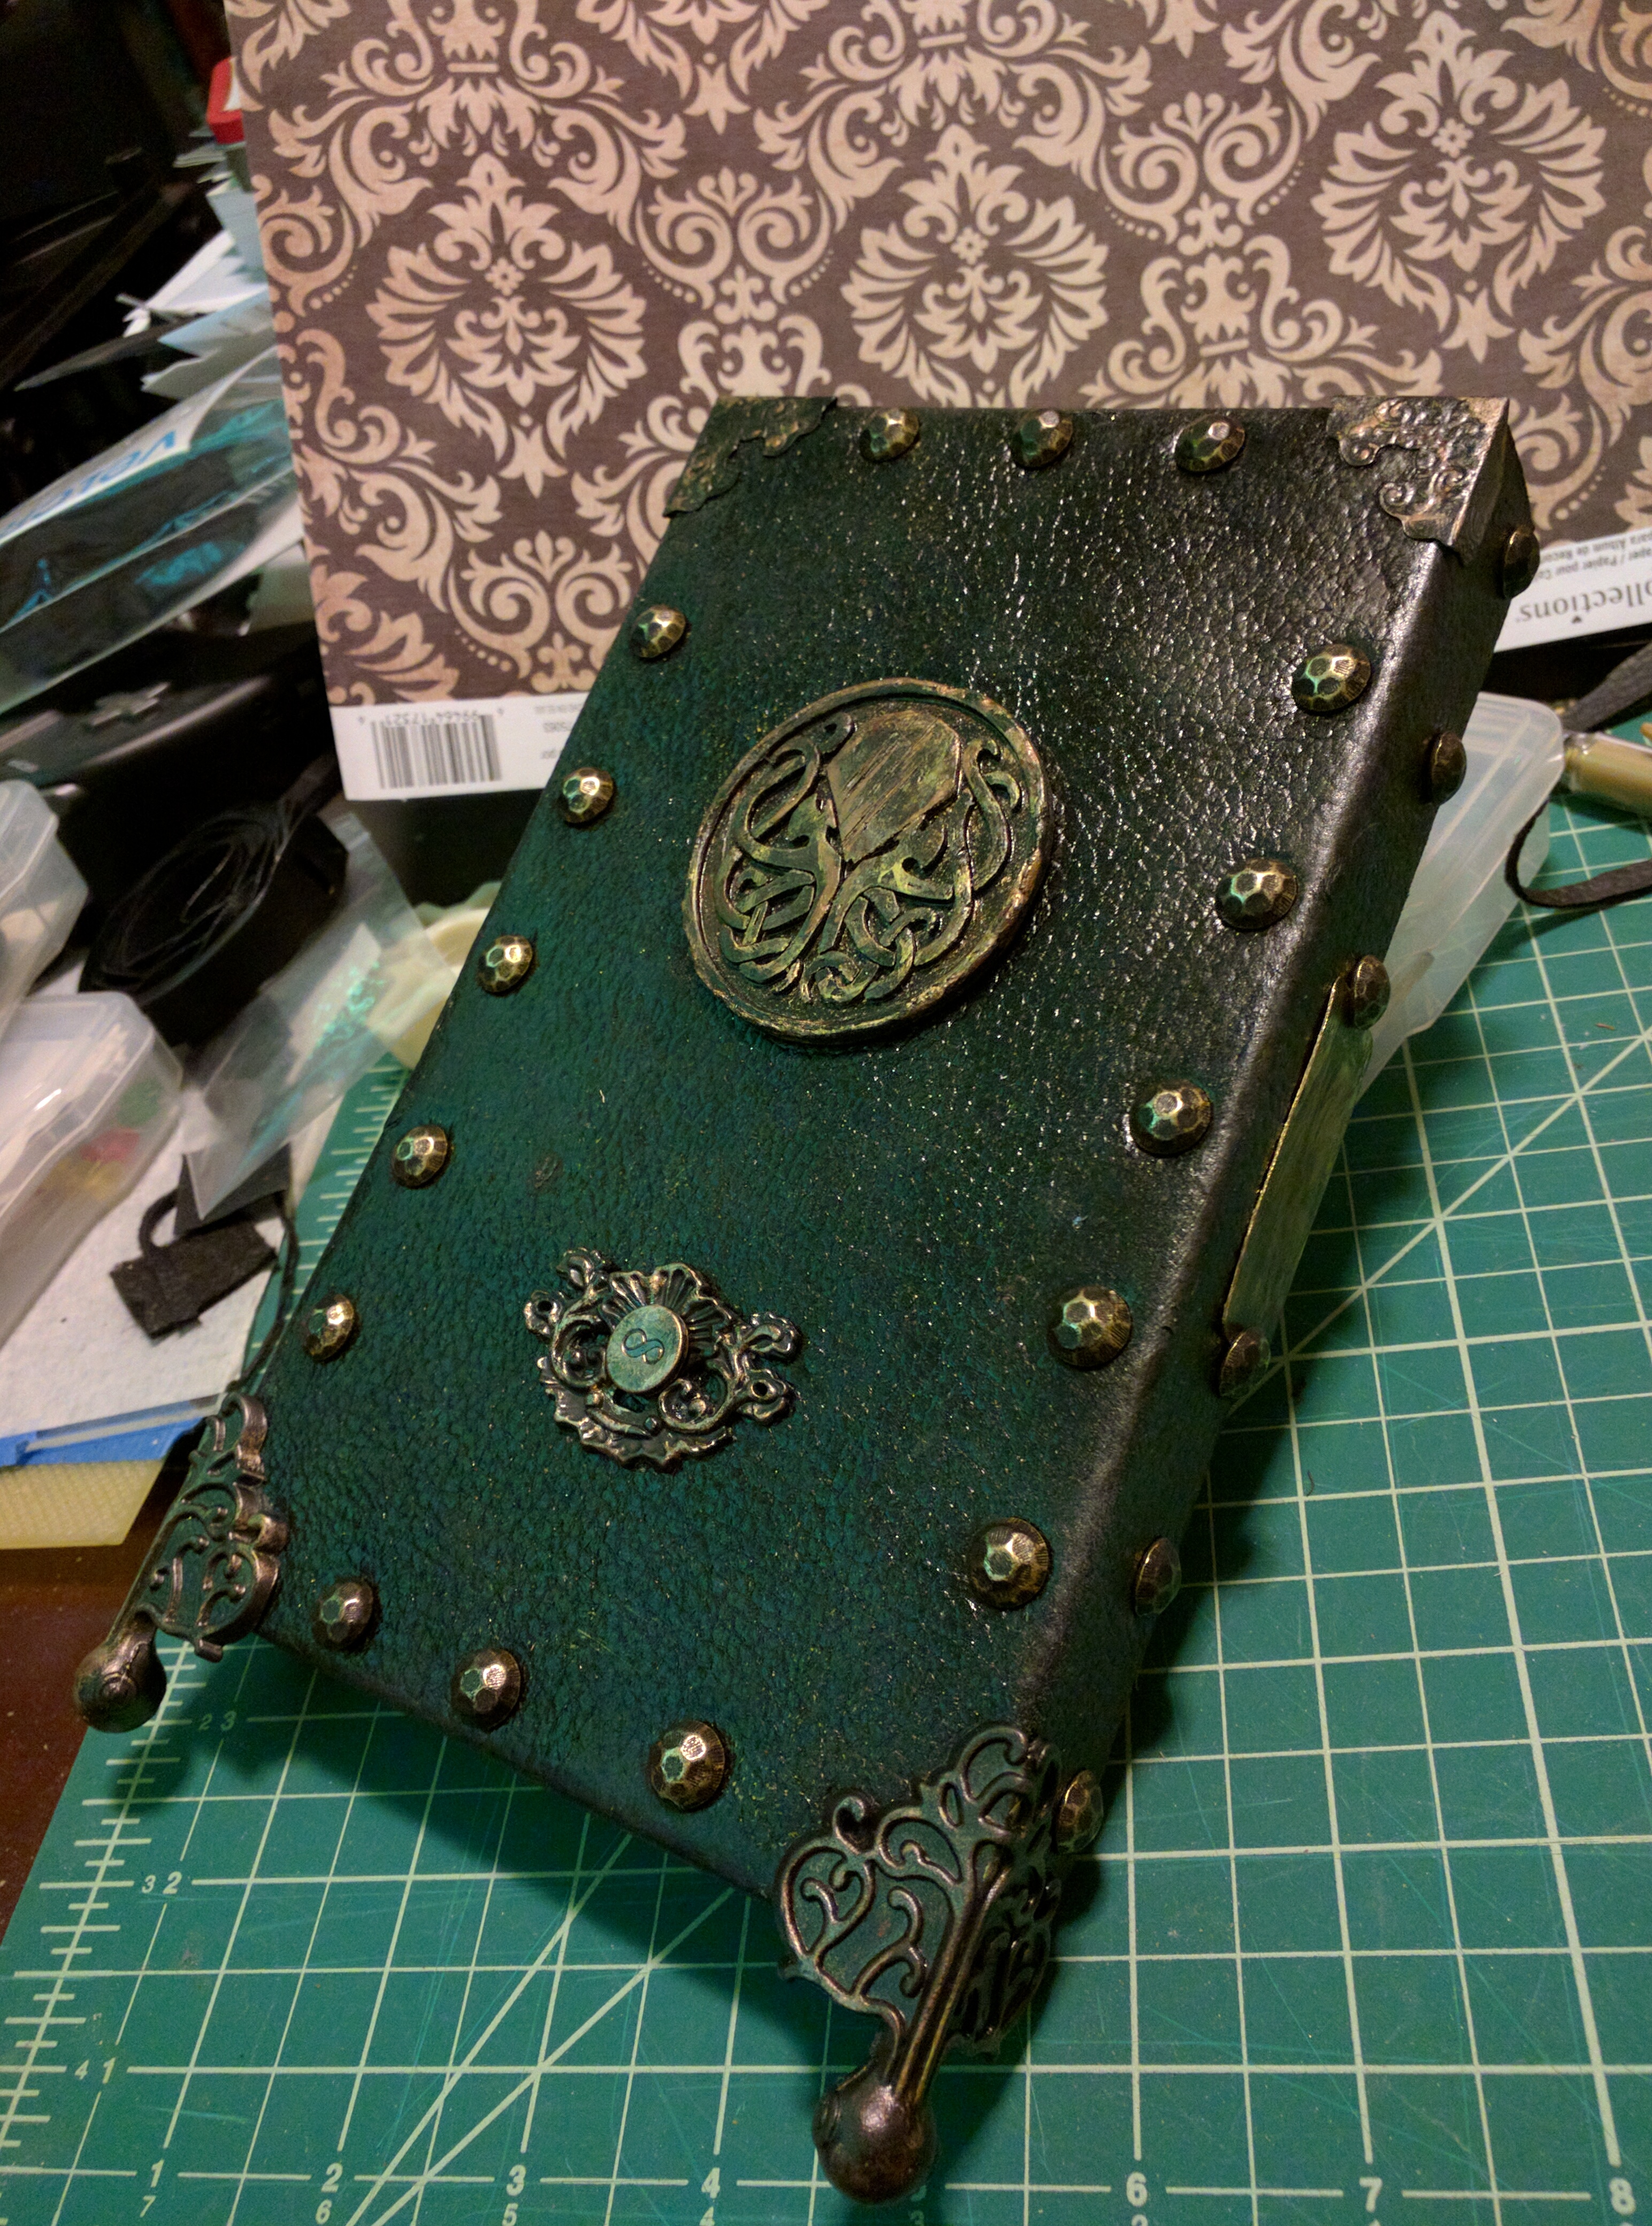
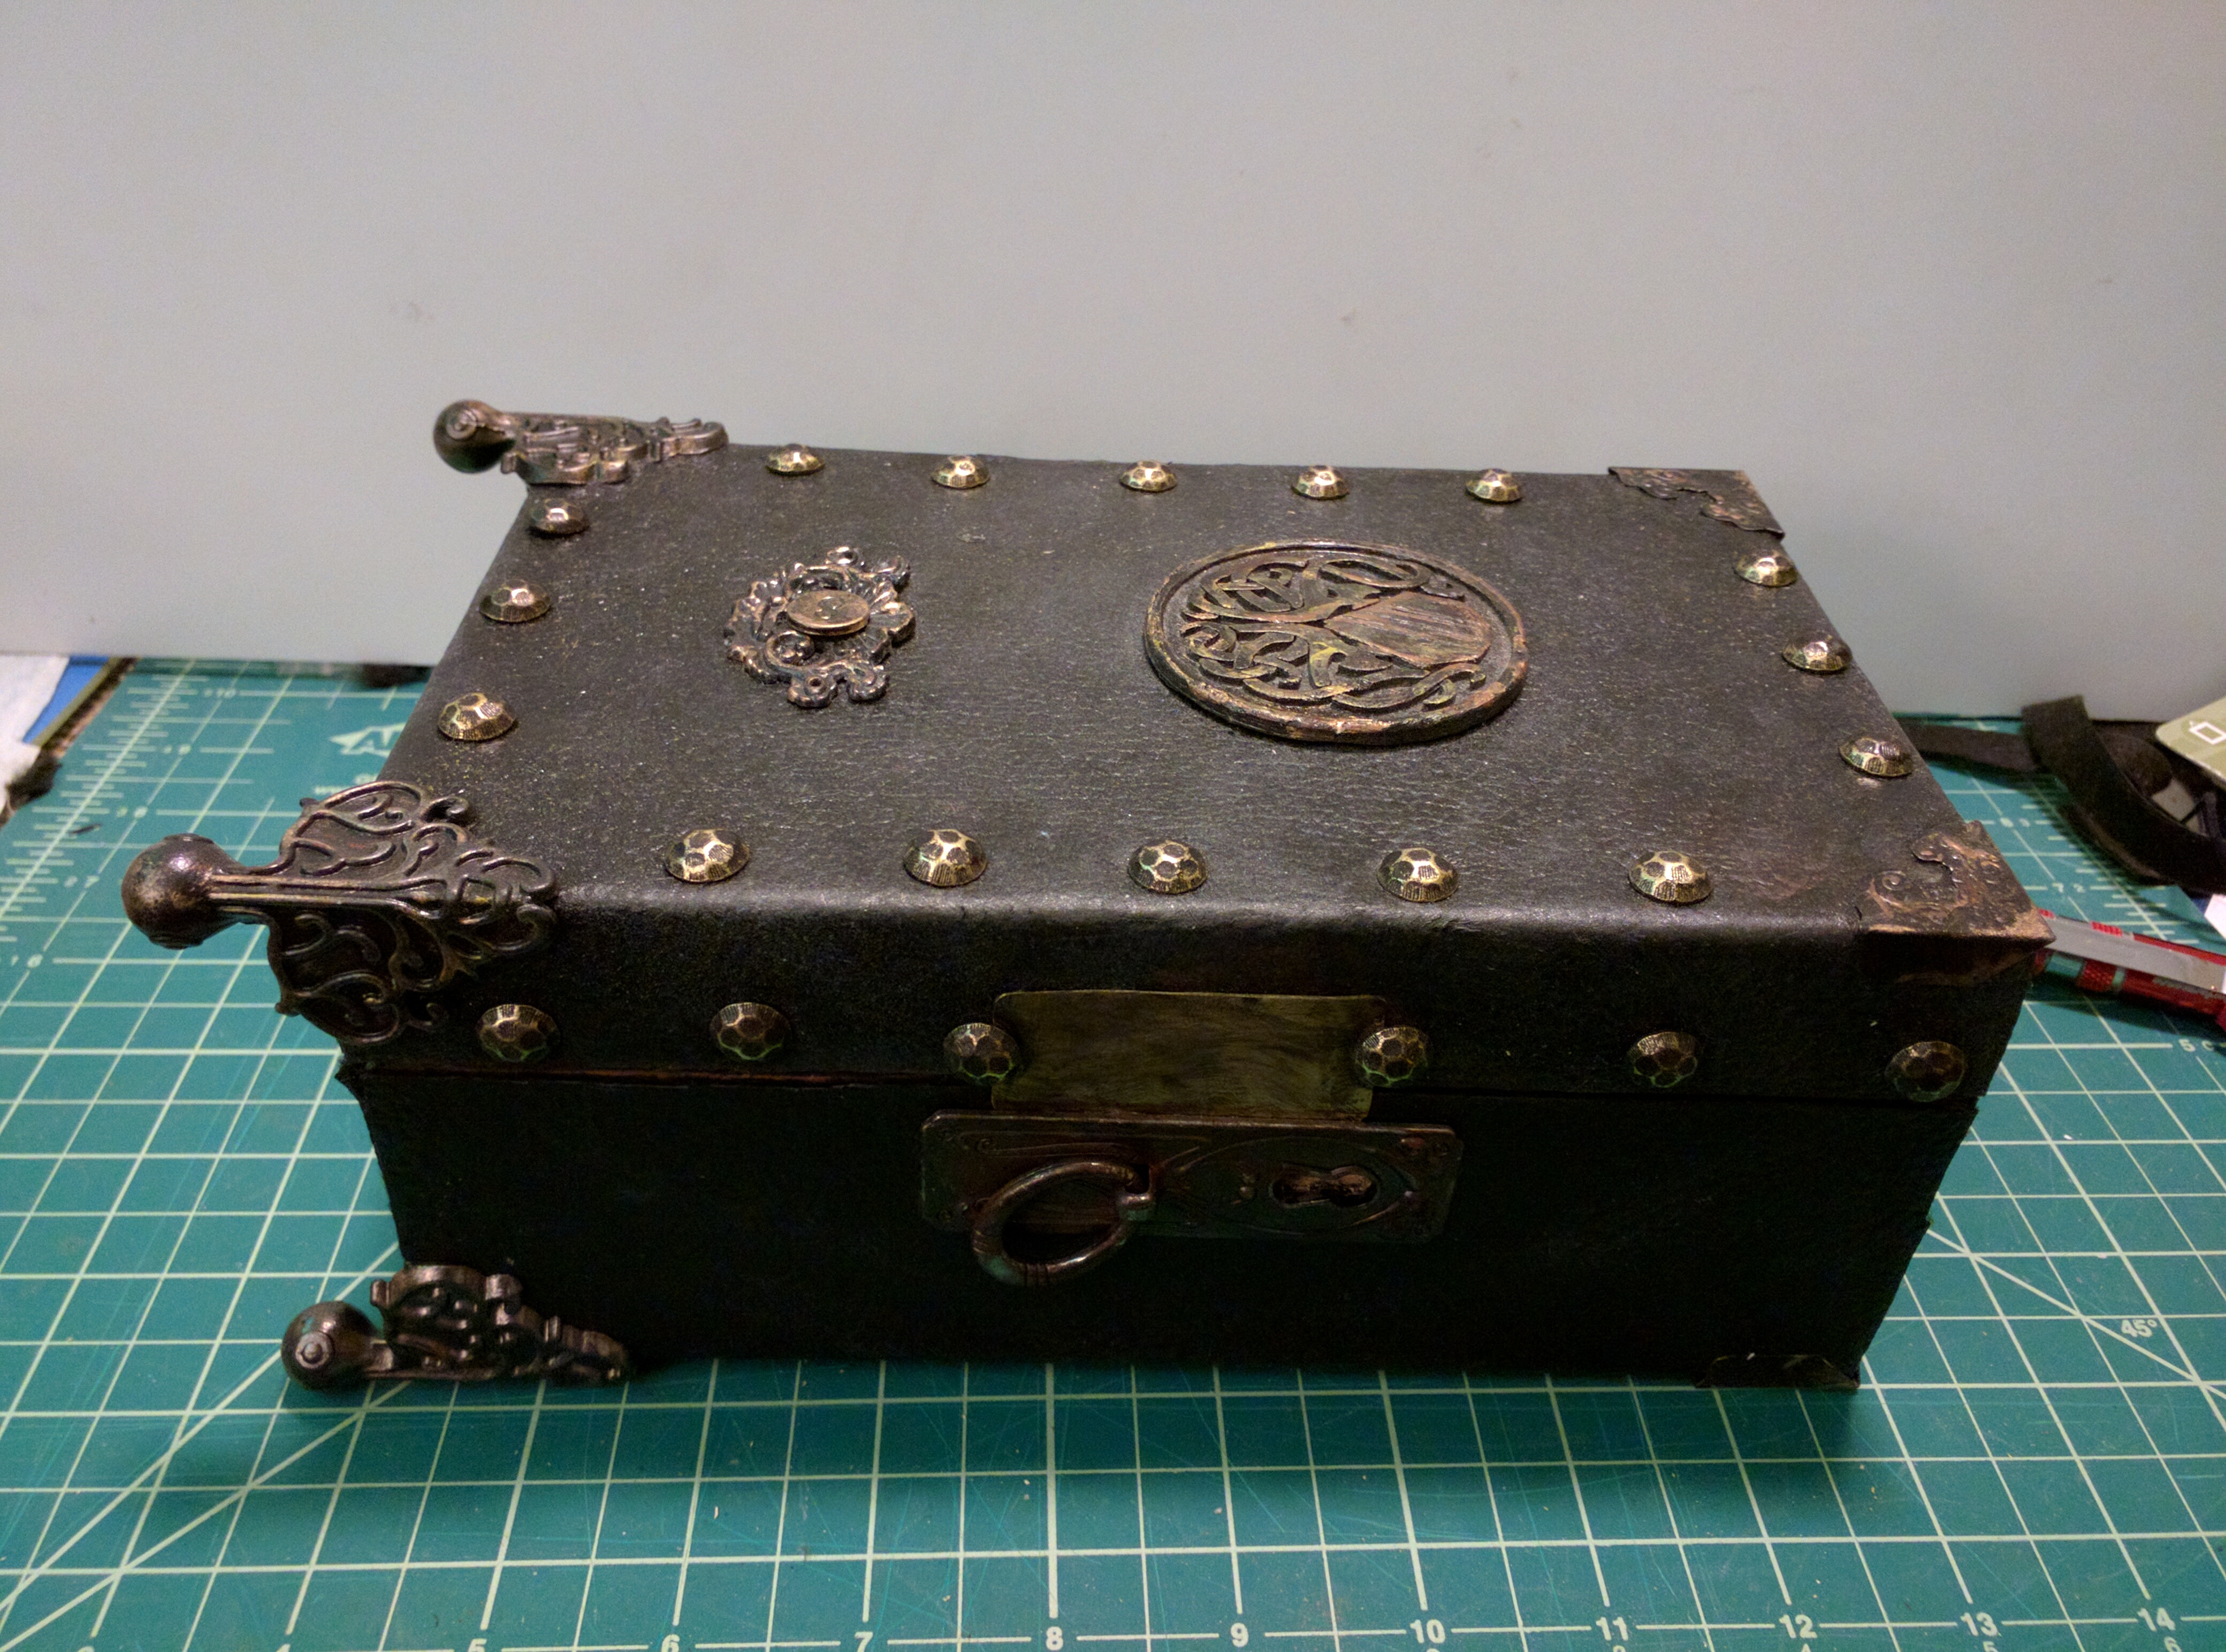
Cult of Cthulhu box
This was a weekend build (but more like two evenings) of a prototype for an idea I had earlier in the week; A box for Cthulhu cultists to hold sacred artifacts.  I’m happy with how it turned out, however I think the next version will be a pocket box which pulls out of the top of the standing outer box. I’ll probably add a handle to the top of this one as, after looking at the pics, it seems appropriate (and what gave me the idea to make it a pocket box next time.)
This is made using an off-the-shelf wooden craft store box with the catch removed. It’s covered in a synthetic hide which I bought off Amazon a while ago. The legs, corners, domed tacks and fake lock mechanism are scrap-booking ornaments bought at Michaels (mostly Jim Holtz brand). They’re sprayed with Dark Bronze hammered-finish paint (except the lock which I decided I’d paint as thought it were iron and rusty) and them weathered with Testor’s gold, Alclad ‘Burnt Iron’, and dulling spray. The interior has a felt bottom and Damask wallpaper in the upper lid. The wood is darkened and aged with a combination of brown acrylic paint and an india ink wash. Spritzes of flat black paint and dulling sprays over everything knock down any remaining shine. A smudged bloody thumb print also seemed appropriate. :)
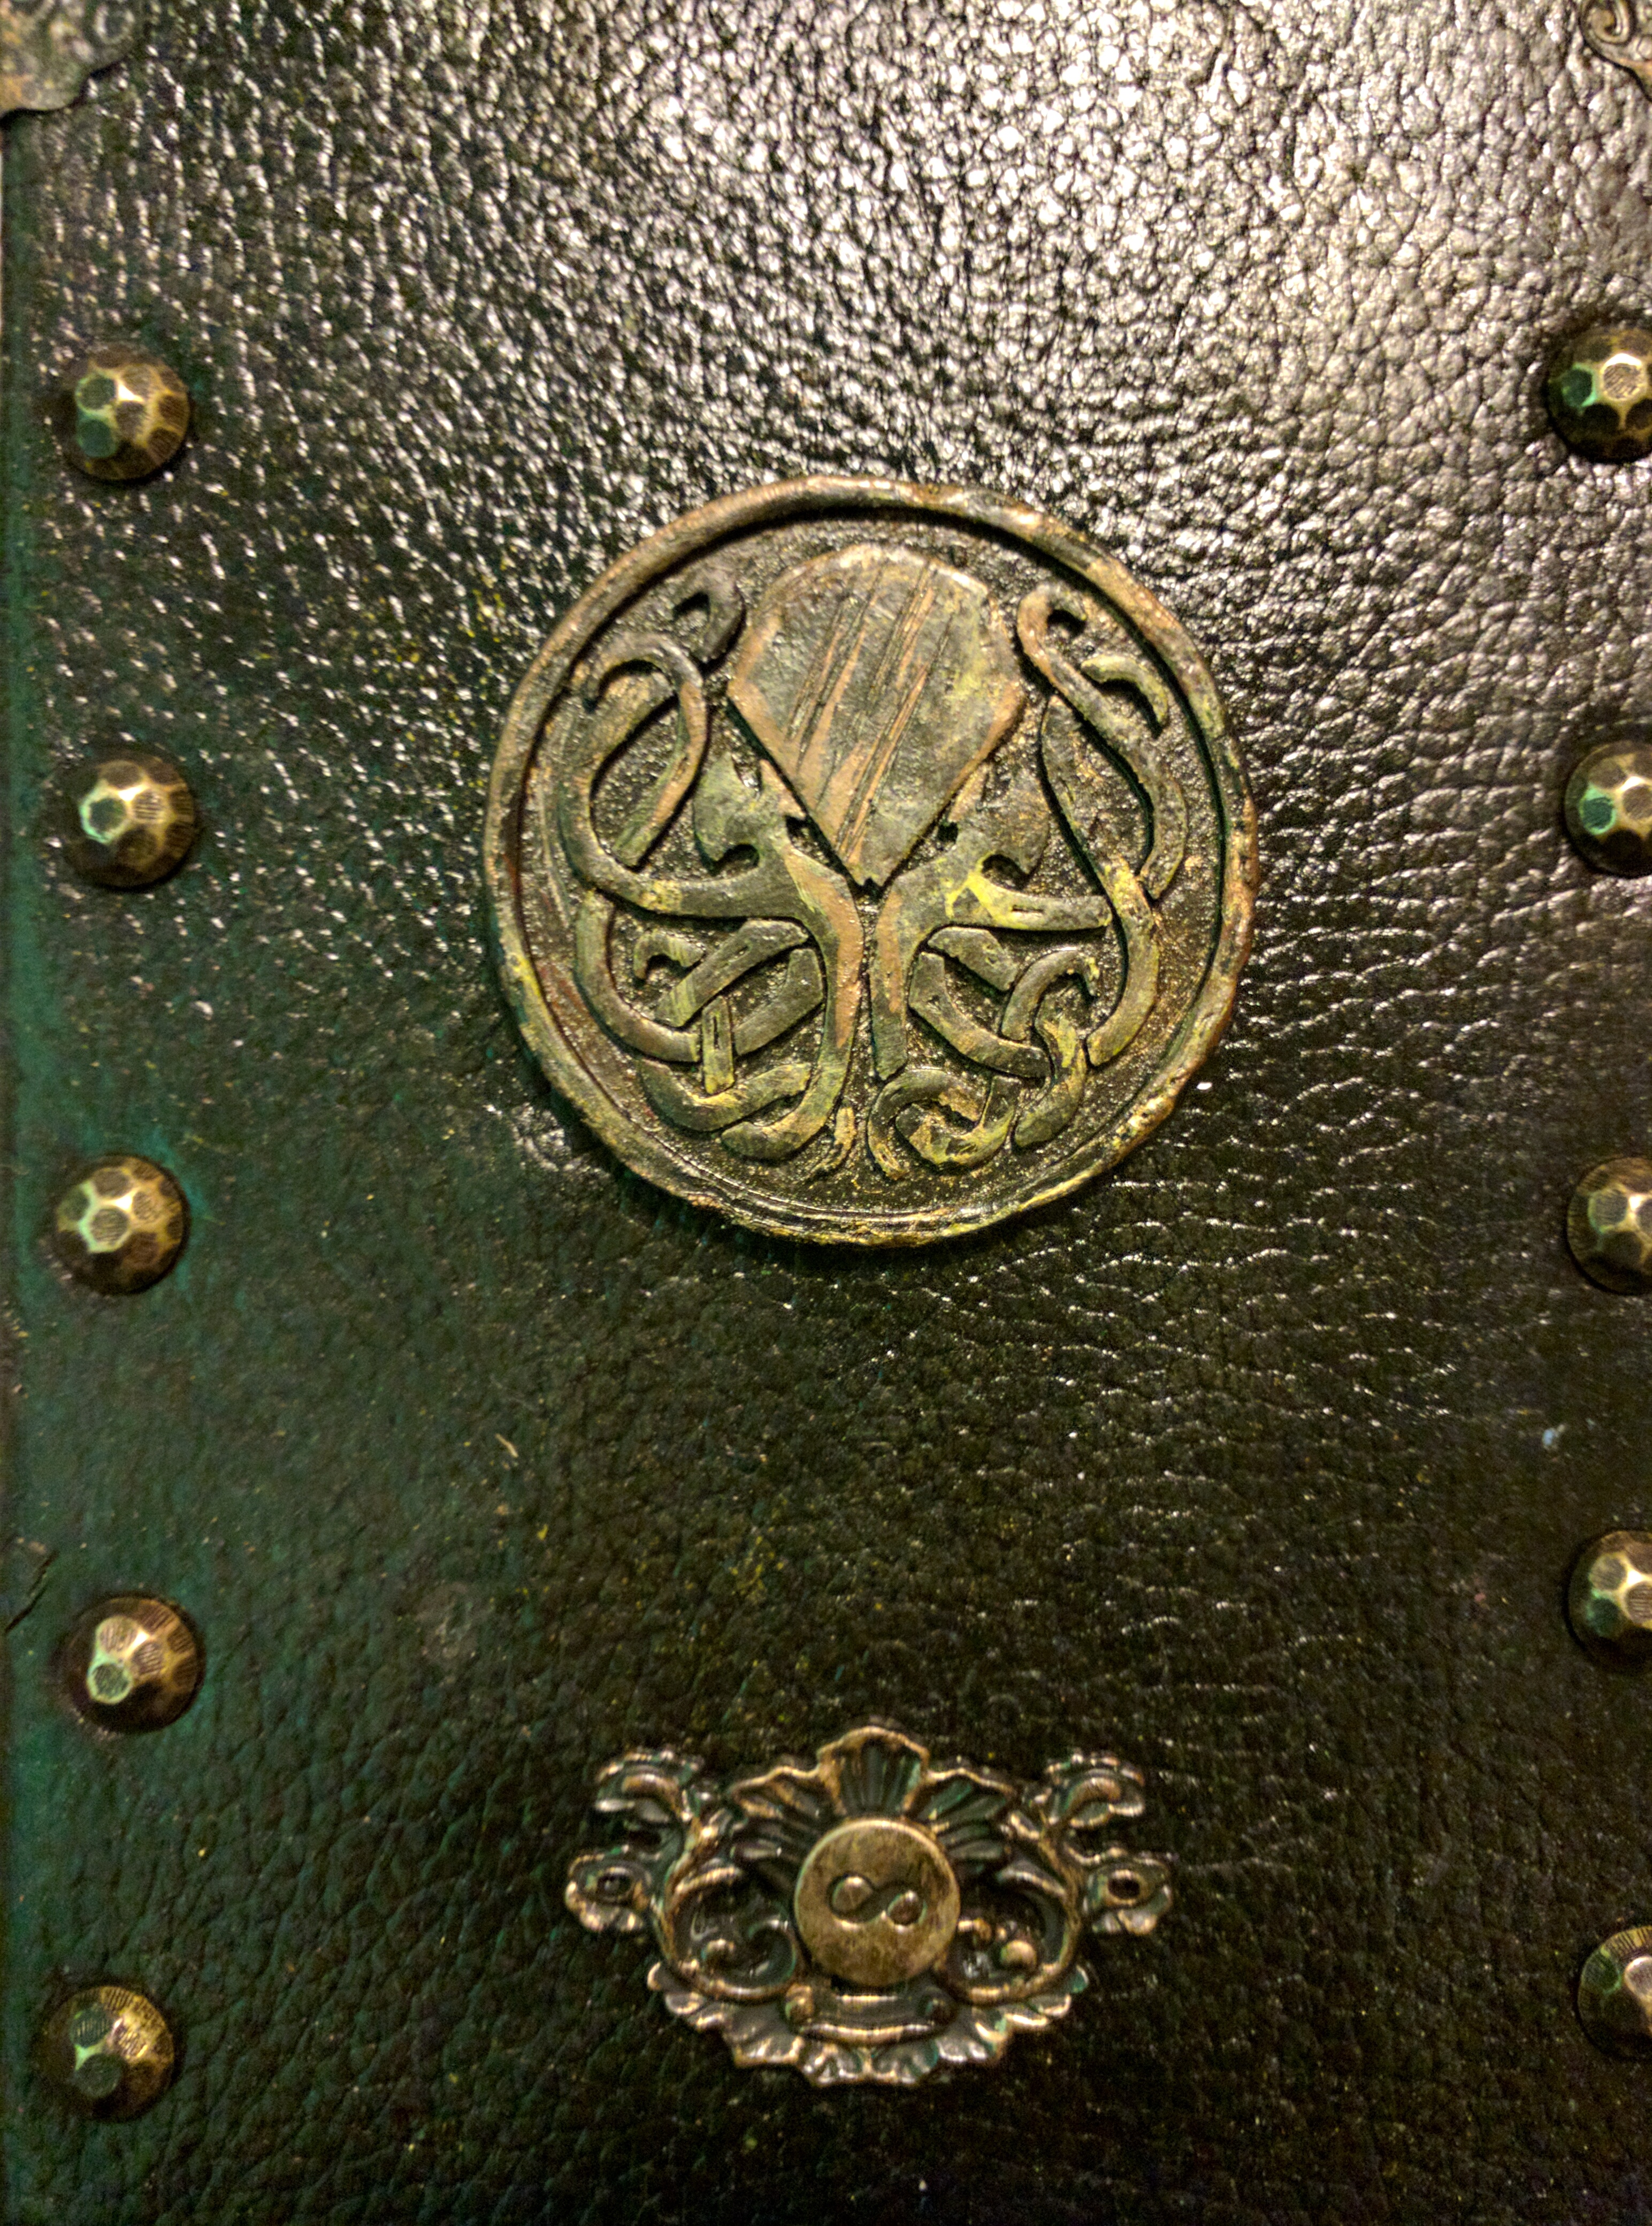
The Cthulhu sigil is 3D-printed using a model from Thingiverse designed by Al Billings. It was sanded, painted with black hammered-finish spray, then weathered with Testor’s gold, a gold paint pen, a green-gold paint pen and india ink wash. The sigil and corners were bonded to the case using super glue,  accelerator and some Gorilla Glue for good measure. The legs were glued the same way, but also have small screws in the bottom for rigidity.
As its a prototype, I haven’t decided if I’ll keep it. Any cultists looking for somewhere to store a dried heart or tentacle, feel free to make an offer.